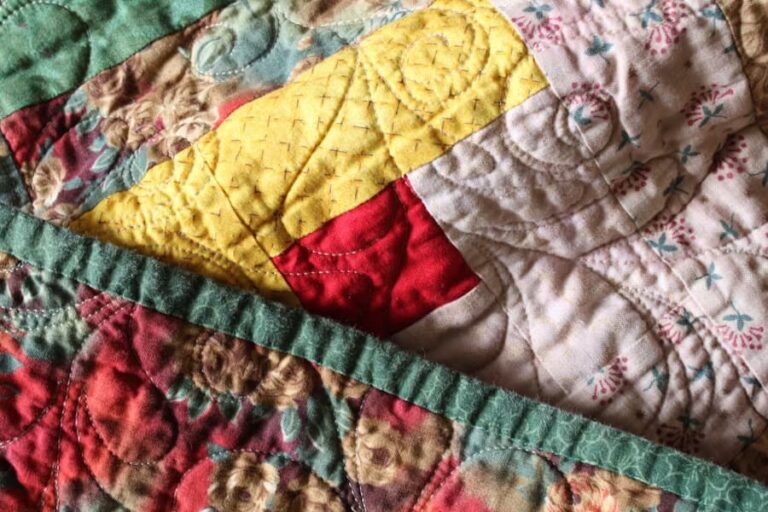
Appliqué is a versatile and artistic technique used in quilting to add intricate designs and patterns to fabric. This method involves sewing one fabric piece onto another, creating a layered effect that adds depth and visual interest to your quilts. If you’re looking to incorporate appliqué into your quilting projects, follow this step-by-step guide to achieve beautiful and professional results. For inspiration, consider designs such as the charming Chamrock pattern, which showcases the elegance and creativity appliqué can bring to your work.
Step 1: Choose Your Appliqué Design
Begin by selecting a design for your appliqué. This can range from simple shapes to intricate patterns. For example, the Chamrock design features elegant, detailed elements that can add a touch of sophistication to your quilt. You can find appliqué patterns in quilting books, online resources, or create your own design. Print or trace the design onto paper or fabric to use as a guide during the appliqué process.
Step 2: Prepare Your Fabric
Once you have your design, choose the fabrics you will use for the appliqué pieces. Select fabrics that contrast with your background fabric to ensure the appliqué stands out. Iron your fabrics to remove any wrinkles and ensure a smooth surface for cutting and sewing. For better stability, you may want to use fusible interfacing or a stabilizer on the back of your appliqué fabric.
Step 3: Cut Out the Appliqué Pieces
Carefully cut out your appliqué pieces according to your design. Use sharp fabric scissors or a rotary cutter for clean, precise cuts. If your design includes small or intricate pieces, consider using a fabric cutting machine or templates to help with accuracy. Arrange the cut pieces on your background fabric to ensure proper placement and make any necessary adjustments.
Step 4: Adhere the Appliqué Pieces
To secure your appliqué pieces to the background fabric, use a temporary adhesive spray or fabric glue. Position the pieces as planned, and press them down to adhere. For more permanent adhesion, you can use fusible webbing. Place the fusible webbing between the appliqué piece and the background fabric, then iron it according to the manufacturer’s instructions to bond the fabrics together.
Step 5: Stitch the Appliqué Pieces
With your appliqué pieces securely in place, it’s time to stitch around the edges. Use a sewing machine with an appliqué foot or a narrow zigzag stitch to sew around the edges of each piece. Alternatively, you can use a straight stitch or decorative stitches to add texture and detail. Choose a thread color that contrasts with your appliqué fabric for visibility. If you prefer hand stitching, use a small, even stitch for a neat finish.
Step 6: Finish the Quilt
After stitching your appliqué pieces, press the quilt again to set the stitches and smooth out any wrinkles. If necessary, trim the edges of the background fabric to ensure a clean finish. Complete your quilt as usual by adding borders, backing, and binding. The appliqué design, such as the intricate Chamrock pattern, will add a stunning focal point to your finished quilt.
Incorporating appliqué into your quilting projects allows you to explore creativity and add unique elements to your designs. By following these steps, you can achieve beautiful results and enhance your quilts with intricate and eye-catching details. Whether you’re using a classic design or a more elaborate pattern like the Chamrock, appliqué offers endless possibilities for artistic expression in your quilting journey.